C++/Visual Studio Build Instructions
Visual Studio Solution files are provided with all base code for ease of use. There is no reason you can’t just do a CMake build on Windows just like you would for Linux or OS X. However, using the provided solution files will allow you to skip some steps and will generally be easier.
Installation
If you are working on your own Windows machine, you will have to make sure that you install Visual Studio 2017. Choose the Community version. Make sure that you install Visual Studio IDE, not Visual Studio Code. You will also have to specify that you wish to build C++ projects during the installation process. On the lab machines, Visual Studio and the C++ Package are already installed.
Compilation
First, you must open the Solution file.
To build, you can either press F7 or select Build -> Build Solution.
Commandline Arguments
Setting and changing commandline arguments in Visual Studio can be a little bit tedious.
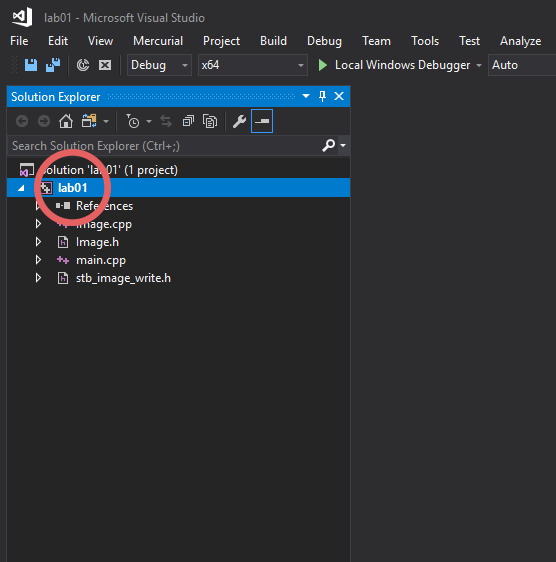
First, right click on the project in the Solution Explorer.
For the first assignment, the project is called lab01.
Make sure that you click on the project, not the solution - the solution will usually have the same name as the project.
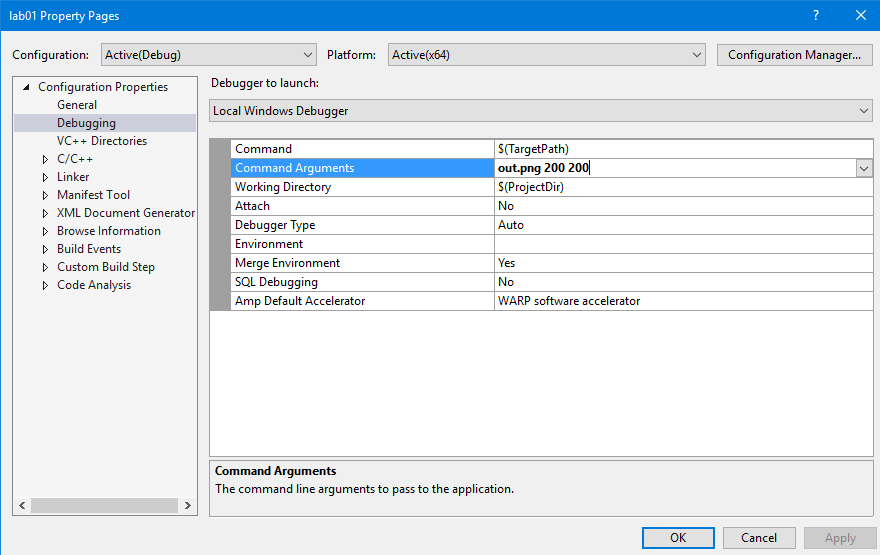
In the right-click menu, select Properties - it’s probably at the bottom. In the Properties window, select Debugging on the right panel. Then, in the right panel, you can type in your command arguments.
Running
To run your program, you can either press F5 or select Debug -> Start Debugging.
If the program exits, the output window (and thus anything printed to standard output or standard error) will close and not be visible.
It’s therefore a good idea to but breakpoints on any return line in main - that way the program will pause and let you examine the output before it exits.
You can put a breakpoint on a line by placing the cursor on that line and pressing F9. You can also click on the margin to the left of the line in question.